Installing Symbiosis on Brightbox
Symbiosis is a legacy open source server management system originally created by hosting company Bytemark.
We’re assuming you’ve used Symbiosis before, and want to install it on Brightbox.
We’re starting after you’ve signed up, and provided your public SSH key and logged into Control Panel.
How to install Symbiosis on Brightbox
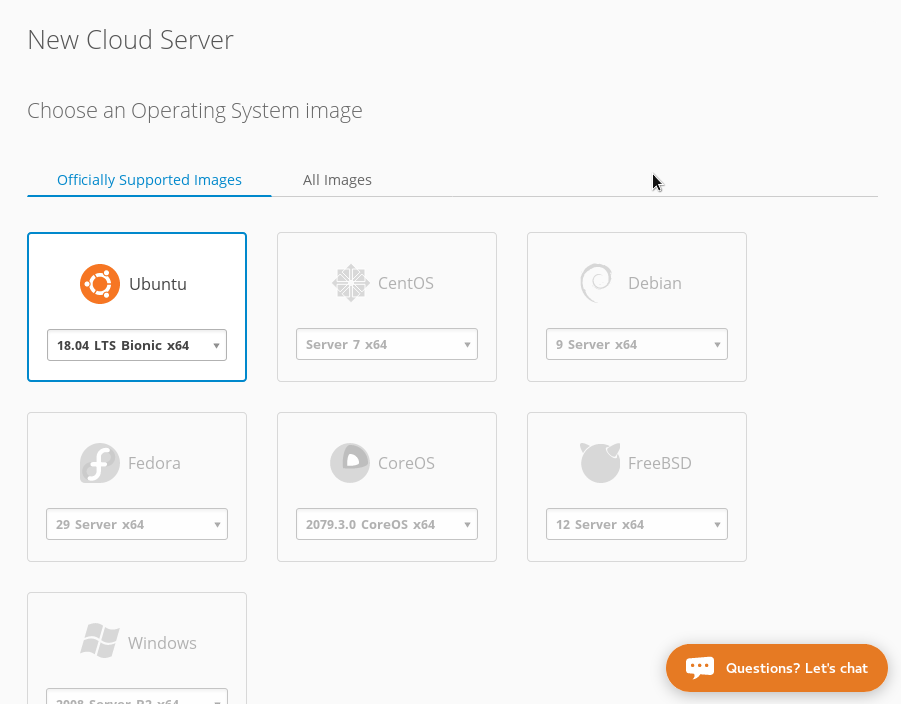
Create a server
Firstly, we will create a Cloud Server with Debian 9:
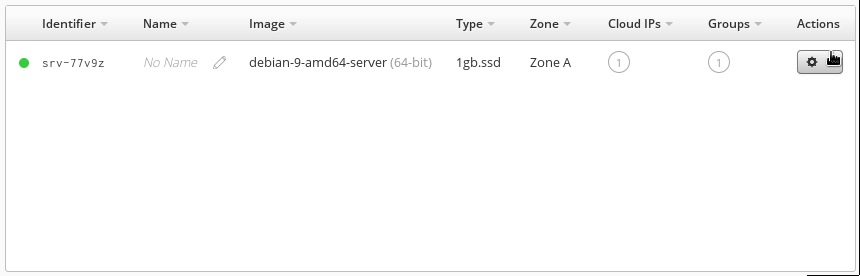
The server will take about 25 seconds to build, when it’s done, click the wheel, and get the ssh details:
SSH to the server:
$ ssh debian@public.<your-server-here>.brightbox.comPrepare for installation
Firstly we need to change the server hostname to match the primary Cloud IP DNS record name. This makes testing new websites work as expected.
$ brightbox=public.$(wget -qO- http://169.254.169.254/latest/meta-data/hostname)
$ echo $brightbox | sudo tee /etc/hostname | sudo tee /etc/mailname
$ sudo hostname $brightbox
Let’s add the Symbiosis GPG key
$ wget https://secure.bytemark.co.uk/key/repositories-2014.key
$ sudo apt-key add repositories-2014.key
And the Symbiosis repository
$ echo -e "# \n# Bytemark Symbiosis Packages \n# \ndeb http://symbiosis.bytemark.co.uk/stretch/ ./ \ndeb-src http://symbiosis.bytemark.co.uk/stretch/ ./" | sudo tee -a /etc/apt/sources.list.d/symbiosis.list
$ sudo apt-get update
Installing Symbiosis
And get Symbiosis installed!
$ sudo apt-get install -y --install-recommends bytemark-symbiosis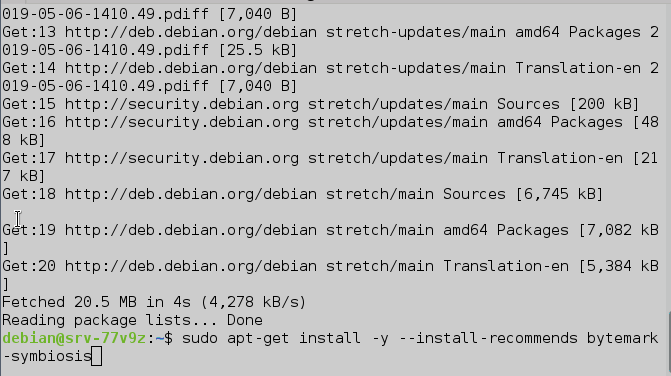
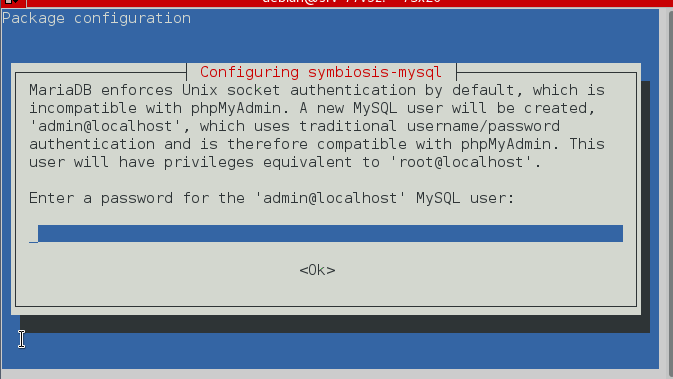
We will be asked a number of questions throughout the installation process:
Configuring Symbiosis-MySQL root password
Enter a memorable and secure mySQL root password for local databases and make a note of it somewhere:
PHPMyAdmin webserver
Run under Apache2 or lighthttpd? Press space to select Apache2, and Tab to get to OK:

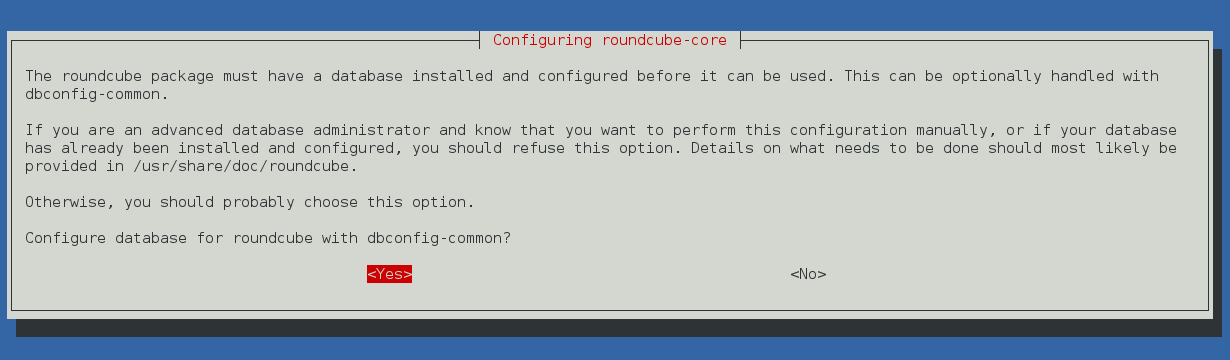
Roundcube database configuration
Press enter to select default “Yes” to use dbconfig-common
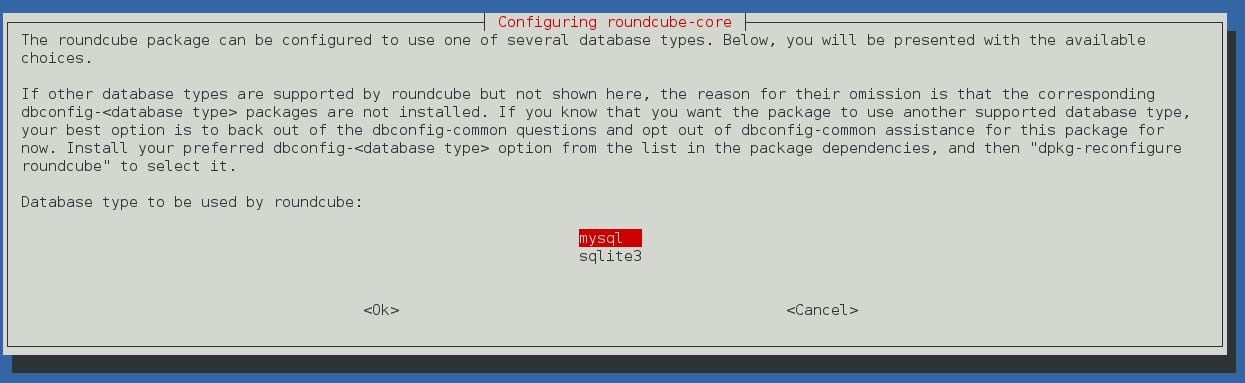
Choose roundcube database
Select default mysql. Press tab, then enter.
Roundcube password setup
Leave blank. Press tab and then enter.

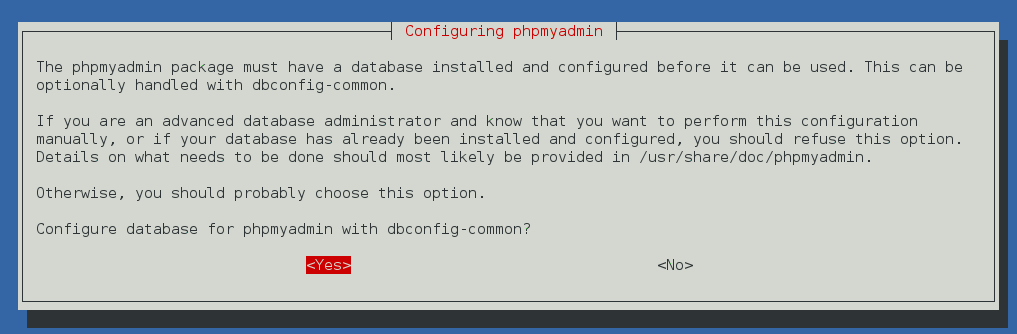
PHPMyAdmin dbconfig-common config
To select “Yes”, press enter.
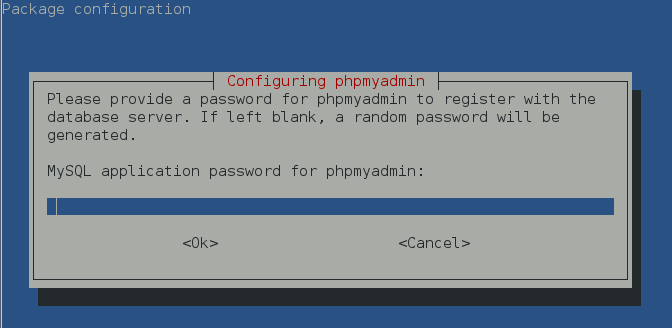
PHPMyAdmin password
Leave blank. Press tab and then enter.
Final Symbiosis setup
We’re nearly done!
Setup login for admin user
When we start using Symbiosis, we’ll use the “admin” user, rather than the “debian” user. Let’s set it up so we can login using our ssh key.
$ sudo mkdir /srv/.ssh/
$ sudo cp /home/debian/.ssh/authorized_keys /srv/.ssh/
$ sudo chown admin:admin -R /srv/.ssh/
Set admin password
Let’s set a password for our new “admin” user so we can easily use sudo.
$ sudo passwd adminReboot
And we’re almost done - let’s reboot it to make sure everything comes online as expected.
$ sudo rebootConnect to Symbiosis
We can now login to Symbiosis with username “admin” and the ssh key you used to login last time.
$ ssh admin@public.<your-server-here>.brightbox.comWhat next?
Maybe create a website or migrate some existing sites?
Known issues:
As Bytemark virtual machines had a different approach to networking, and access to a slightly different set of services there are currently a few things known to work differently:
DNS record creation
Brightbox does not run any DNS service and recommends using a 3rd party DNS provider. This effectively means that the Symbiosis features related to DNS aren’t functional on Brightbox. Currently this means that you will have to create DNS records manually. A Symbiosis fork is looking at creating some tight integration with 3rd party DNS services
Support and help?
Development of Symbiosis appears to have stalled and a fork Sympl has sprung up Gitlab. At present, the Sympl community (#sympl on irc.freenode.net) seems like the best place to follow and contribute to the future development of the project.