Creating a PostgreSQL Cloud SQL instance
This guide will take you through building and accessing a PostgreSQL Cloud SQL instance. You’ll need to have signed up and logged into Brightbox Manager.
Click Cloud SQL
in the navigation bar on the left and you’ll get the list
of your existing Cloud SQL instances, if you have any.
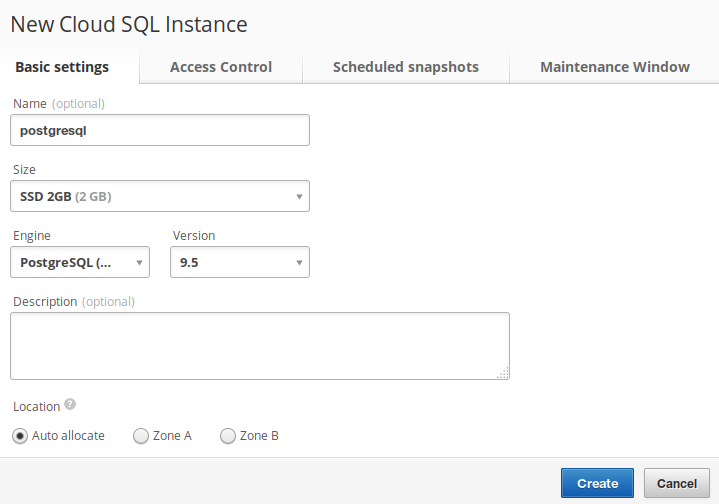
Click New Cloud SQL Instance
and a dialog box will pop up. Choose a name
for your new instance, and a suitable size for your use case (see
the pricing page for a list of the type specs and
prices).
Then click the Engine
select box, which defaults to MySQL, and choose
PostgreSQL
. The Version
select box should auto-switch to
11
There are a few other options you might want to customise which we’ll go through now, but you can change any of these at any time after creation so don’t worry.
Access Control
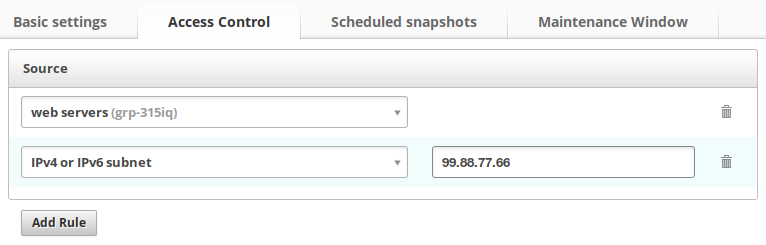
If you click the Access Control
tab you’ll see that the default access to
the new instance will be only from cloud servers in the default group. You can
add as many rules as you like here. As an example, in the screenshot above, you
can see the default rule as been changed to allow access from cloud servers in
a web servers group (which of course will contain all the web servers that
are going to be using this cloud sql instance).
Additionally, you might want to grant access to an external IP address, such as your office network, so you can access the instance directly over the internet to manage it.
Scheduled Snapshots
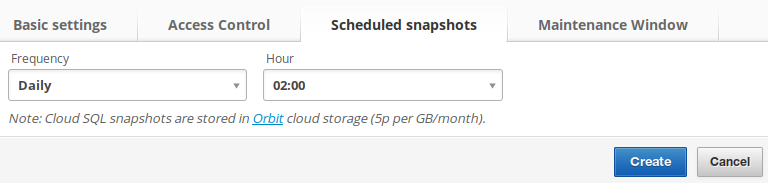
If you click the Scheduled snapshots
tab you’ll see the default frequency
and time that has been chosen to
take automatic snapshots of
the new instance, which you can customise if you like. In this example, it is
daily at 2am (UTC) which means a snapshot of the instance will be taken each
night at 2am and stored
in Orbit. Snapshots are seamless and
do not interrupt service.
Maintenance Window
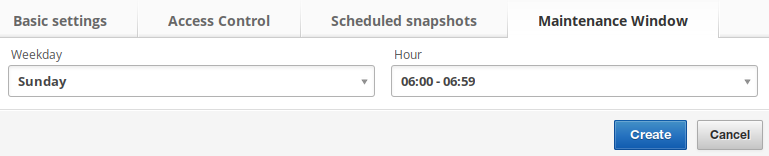
If you click the Maintenance Window
tab you’ll see the default day and
hour that automated maintenance will take place. During this time each week, any
necessary security updates are rolled out and may interrupt service - usually
only short interrupts as their instance is restarted for the updates to take
effect. So choose an appropriate time for your requirements.
Create the instance
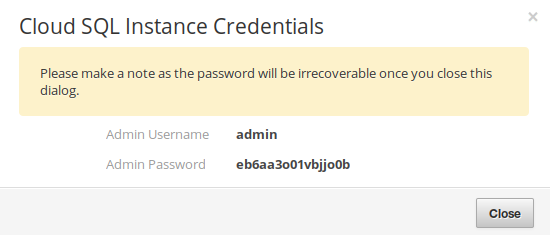
Now you’ve set all your options, click Create
. A dialog will pop up that
displays the PostgreSQL administrator credentials for your new instance. This
should be a user named admin and a randomly generated password. Note the
password down.
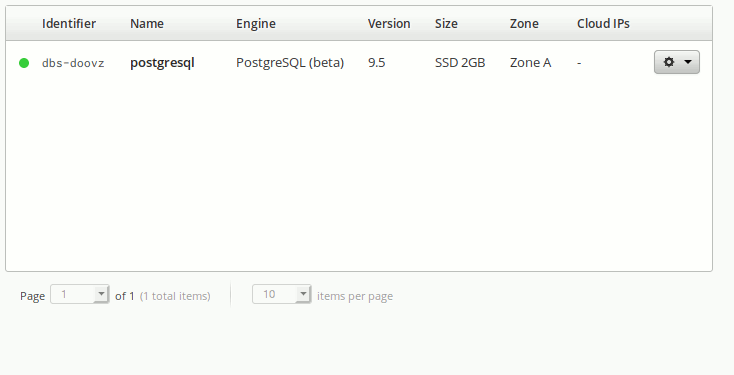
You’ll see the new instance in the list and the status icon will be spinning to show that it’s building. Once it’s finished building it will go green and you can continue with this guide.
Map a Cloud IP to the instance
To access the instance, we need to map a Cloud IP
to it. Click the cog button on the right of the instance in the list and select
Map Cloud IP
. A list of your existing unused Cloud IPs will appear - if
you don’t have any yet you can select Create & map new Cloud IP
and a new
one will be created for you. Choose a Cloud IP and click the Map
button. An icon will appear in the Cloud IPs
column for your instance to
show it has active mappings. If you hover over it you’ll see the Cloud IP
identifier and IP address. Note the IP down.
Access the instance
Now we can simply access the instance using a standard PostgreSQL client, such
as psql, from anywhere you granted access to when you created the instance
(such as from your office IP). Just connect to the Cloud IP address, using the
admin username and the auto-generated password you noted down. Be sure to
connect to database named postgres:
$ psql -h 109.107.35.175 -U admin postgres
Password for user admin:
psql (11, server 11)
SSL connection (protocol: TLSv1.2, cipher: ECDHE-RSA-AES256-GCM-SHA384, bits: 256, compression: off)
Type "help" for help.

postgres=>
Create a less privileged user
We recommend that you don’t have your applications use the privileged admin
account and instead create unprivileged accounts for each app:
$ psql -h 109.107.35.175 -U admin postgres
Password for user admin:
psql (11, server 11)
SSL connection (protocol: TLSv1.2, cipher: ECDHE-RSA-AES256-GCM-SHA384, bits: 256, compression: off)
Type "help" for help.

postgres=> CREATE USER blog WITH PASSWORD 'secret';
CREATE ROLE

postgres=> CREATE DATABASE blog;
CREATE DATABASE

postgres=> GRANT ALL PRIVILEGES ON DATABASE blog TO blog;
GRANT
Reset the admin password
If you lose or forget the admin password, you can reset it at any time. Click
the cog button and select Reset admin password
from the menu. A new
password will be generated for the admin account and displayed to you.
Another reason to use separate accounts for your applications - you can reset the admin password without having to reconfigure anything!