Building a GitLab server in 5 minutes
GitLab is basically an open source clone of GitHub, allowing you to host your own git-based code collaboration system.
Brightbox are big fans of GitLab and have been sponsoring their demo servers since way back in 2011!
This guide goes through getting a GitLab server of your own up and running in just a few minutes by using our user-data service to pre-configure things on first boot.
It’ll be set up so that GitLab can send emails and that security upgrades are automatically applied nightly using unattended-upgrades.
First things first, get signed up and logged into Brightbox Manager. Make sure you provide an ssh key, so you can access your new server after it’s built.
Build the server
Click Cloud Servers
in the navigation bar on the left and then click the New Cloud Server
button on the right.
This pops up the New Cloud Server
dialog.
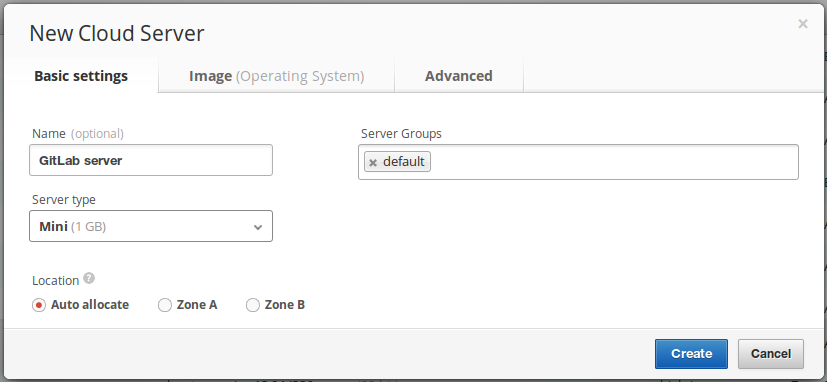
Give your new server a descriptive name like GitLab server
and change the Server Type to at least a 1GB RAM Mini, which is the recommended minimum for GitLab.
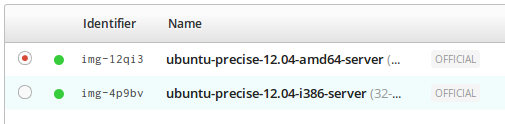
Now click the Image
tab and search for “12.04”
to find the official Ubuntu 12.04 images and select the ubuntu-precise-12.04-amd64-server
image.
User data
Now click the Advanced
tab and paste the following script into the User defined metadata
box:
#!/bin/sh
DOWNLOAD_URL=https://downloads-packages.s3.amazonaws.com/ubuntu-12.04/gitlab_6.9.2-omnibus-1_amd64.deb

apt-get update
echo postfix postfix/main_mailer_type select "Internet Site" | debconf-set-selections
echo postfix postfix/mailname select `hostname -f` | debconf-set-selections
echo unattended-upgrades unattended-upgrades/enable_auto_updates boolean true | debconf-set-selections
apt-get -y install language-pack-en postfix unattended-upgrades

curl -o /tmp/gitlab.deb $DOWNLOAD_URL
dpkg -i /tmp/gitlab.deb
gitlab-ctl reconfigure
You can get the latest GitLab Ubuntu download url from their downloads page - just update the DOWNLOAD_URL variable.
Then click the Create
button and server will be built and will start auto-installing GitLab and all it’s dependencies.
Map a Cloud IP
Once the server goes into active
state, indicated by the green circle, you’ll want to map a Cloud IP to it so you can access it over IPv4 (if you’re IPv6 enabled you can skip this step)
Click Cloud IPs
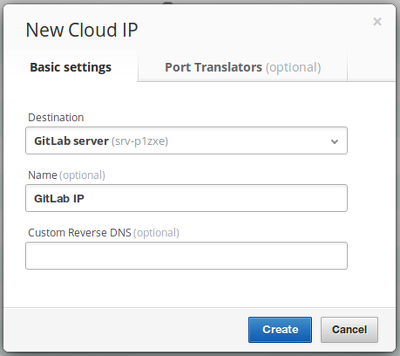
in the navigation bar on the right and click New Cloud IP
.
Change the Destination
to your new GitLab server and click Create
.
Firewalling
The default firewall policy allows HTTP and SSH and blocks everything else (like PostgreSQL) so your GitLab server is pretty well secured - you don’t need to add or change any rules.
If you’ve changed the defaults, be sure to setup a new policy and open the appropriate access.
Access your new GitLab installation

You can now access your new GitLab installation, just stick the Cloud IP address in your browser, or you can use your servers public hostname: public.srv-xxxxx.gb1.brightbox.com.
If you have IPv6 you can access your server using it’s IPv6 hostname: ipv6.srv-xxxxx.gb1.brightbox.com.
If you get a connection refused message, then the GitLab installation is still in progress - our cloud servers can be booted and accessible in less than 30 seconds but GitLab has lots of dependencies to be configured and takes a bit longer, so give it a minute or two.
The default admin account is root with a password of 5iveL!fe.
SSH Access
If you provided an SSH key during signup as suggested, you can ssh into your server using the username ubuntu:
$ ssh ubuntu@public.srv-xxxxx.gb1.brightbox.comAnd you can get root access using sudo:
ubuntu@srv-xxxxx:~$ sudo gitlab-ctl status

run: nginx: (pid 1612) 38s; run: log: (pid 1610) 38s
run: postgresql:     (pid 1613) 38s; run: log: (pid 1605) 38s
run: redis: (pid 1608) 38s;     run: log: (pid 1606) 38s
run: sidekiq: (pid 1614) 38s; run: log: (pid     1611) 38s
run: unicorn: (pid 1609) 38s; run: log: (pid 1607) 38s
Backup
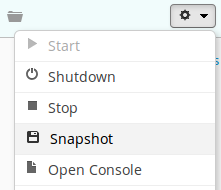
You can backup your new GitLab installation by snapshotting it and when you want to restore you just build a new server from the snapshot image.
Or you can use GitLab’s own backup system that creates tar archives, which you can copy offsite.
More
There is more to GitLab than just bootstrapping an initial install, so get stuck into the documentation to see what else can be tweaked and configured.