Scaling Wordpress on Brightbox
In our previous guide we demonstrated how to install Wordpress on Brightbox, using a single server to handle the PHP and media content, and a Cloud SQL instance to host the MySQL data.
If your site becomes very popular you might find that its performance starts to suffer, and the most likely culprit will be the PHP interpreter on your single webserver. Thankfully with the Brightbox load-balancer it is very straightforward to replace a single cloud server with a small pool of servers without having to update DNS, or worry about the IP addresses involved. The key to this ability is the notion of a Cloud IP, which can be seamlessly moved to point to different things.
In the previous guide we mapped a Cloud IP to point to a single server, and now we’ll look at replacing that single-server deployment with a pair of cloud servers, moving the existing Cloud IP to point to a cloud load balancer instance, which will in turn route traffic to our two servers.
If you walk through the process of creating a second guest, and installing a second copy of Wordpress you’ll end up with a view like the following in your cloud server list:
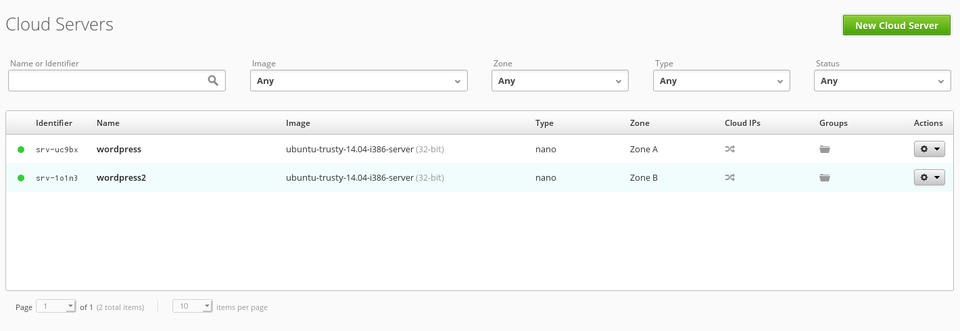
NOTE: We assume you’ve copied the
wp-config.phpfile from the first server to the second, such that this second instance will be configured identically to the first, and will share the underlying database details.
The thing to note here is that we’ve got two servers, each of which is capable of serving Wordpress to visitors.
Using the Brightbox load-balancer
A load balancer is typically used as part of a high-availability setup, and can also increase performance by routing traffic destined for a single IP address, and port, to an arbitrary number of back-end hosts.
To create a load balancer use the Brightbox Manager, and select Load Balancers
from the sidebar. We’ll want to configure this new load balancer to listen on port 80, and send all traffic to the two cloud servers we’ve configured and installed Wordpress upon.
Create a new load balancer, and give it a name:
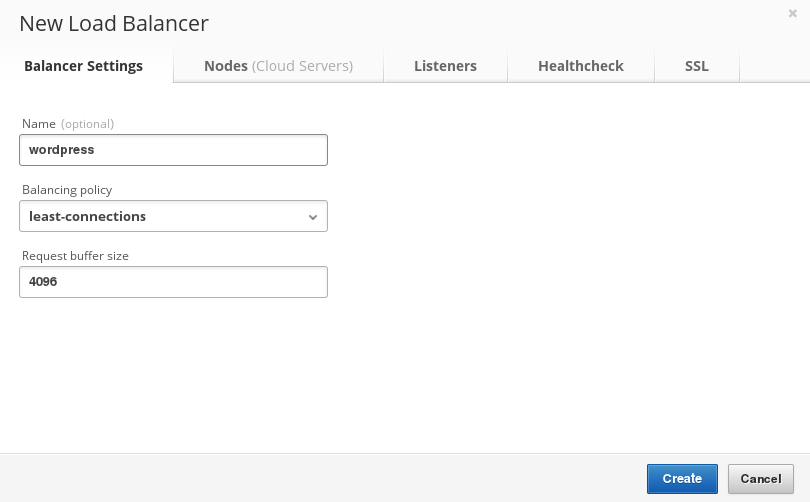
Once you’ve given it a name, select the servers to which it will route traffic:

At this point we need to step back and consider what we have in terms of IP addresses, and what we want to end up with. At the end of our previous article we only had one cloud server which visitors would have hit. Since then we’ve added a second server, and we’ve just created a load balancer. Our end goal is for visitors who access the originally published cloud IP to hit the load-balancer, from where traffic will be routed to the two servers.
So what we need to do is move the cloud IP from the server to which we’d originally mapped it, and instead point it at the load balancer. (Then we’ll want to map a new cloud IP address to that server, so that we can continue to access it via SSH for our own use. The load balancer itself doesn’t care if the destination servers have cloud IPs because it can reach them directly via the internal Brightbox network.)
Select the Cloud IP
menu-item on the sidebar of the Manager, and you’ll see a view similar to this:
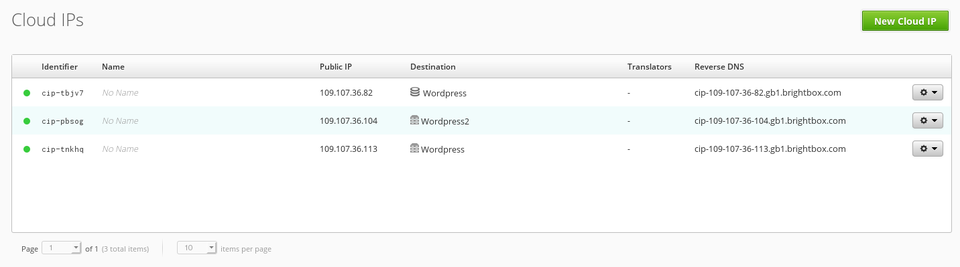
Using the actions menu to the right of the table select Edit
on the cloud IP associated with the original cloud server, and you’ll be presented with a dialog like so:
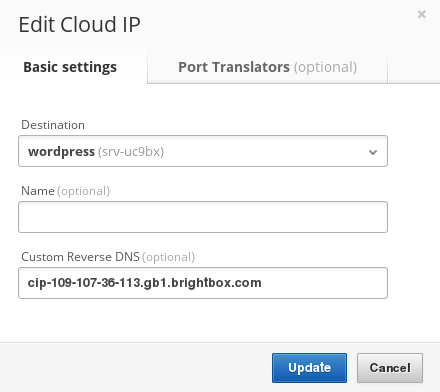
Now select the new load balancer instance, and approve the change by clicking on the Update
button, and the change will be applied - from this point incoming traffic which used to go directly to the first cloud server will now hit the load balancer. That load balancer has been configured to route traffic to both of our servers, effectively meaning that 50% of all incoming traffic will be handled by one host, and 50% by the other. This means that any high load the initial server might have suffered should now be reduced, as it will be spread amongst the pair of servers.
NOTE: You’ll probably want to remap a new cloud IP to the original server now, such that you can connect to it via SSH. (You don’t need to map IPs to cloud servers if you’re only using them via a load balancer, or if you have a native IPv6 address.)
Caveats when scaling via load-balancing
Many applications deployed on webservers will see their throughput and availability increase when moved behind a load-balancer. However there are cases where you’ll find you need to perform additional work. Sadly Wordpress is potentially one of them, depending on the kind of use you put it to.
Any time your servers need to maintain a shared state or identical local filesystem contents, you’ll run into possible issues because requests are ultimately handled by unrelated machines. As an example, imagine you posted a blog entry and uploaded a graphic to be included in that post. The upload would be sent to one particular server, and it would succeed. Visitors who hit that particular server in the future would see the graphic, as intended. However if the load balancer sent the traffic to a different server the graphic would not be present - resulting in the visitor seeing a missing image.
The solution to these problems will vary depending on your particular application, but it might involve:
- a shared filesystem that all nodes maintain.
- GlusterFS is a good example.
- storing media in the database
- This works because each host shares a common database.
- an automated syncing process.
- For example, a cron-job that syncs filesystem contents via
rsync, orunison..
- For example, a cron-job that syncs filesystem contents via
In our case we’ve not explicitly discussed this, but if you install plugins, or want to share media then this is something you might need to investigate.
Scaling Cloud SQL instances
Depending on your application, and the components it uses, you might find that your limiting factor is the Cloud SQL instance.
The simplest solution to that problem would be to create a snapshot of your SQL instance contents, and deploy that snapshot to a larger Cloud SQL instance, effectively increasing the resources dedicated to hosting your database-data. That is outside the scope of this particular guide, but will be covered in the future.