Resizing a Cloud Server
Cloud Servers can be resized by changing the Server Type – which defines the amounts of RAM, CPU and (where applicable) local SSD storage allocated to the cloud server.
Resizing to a larger RAM size
When increasing the RAM amount, the resize can be initiated while the Cloud
Server is running or stopped (i.e state of active or inactive).
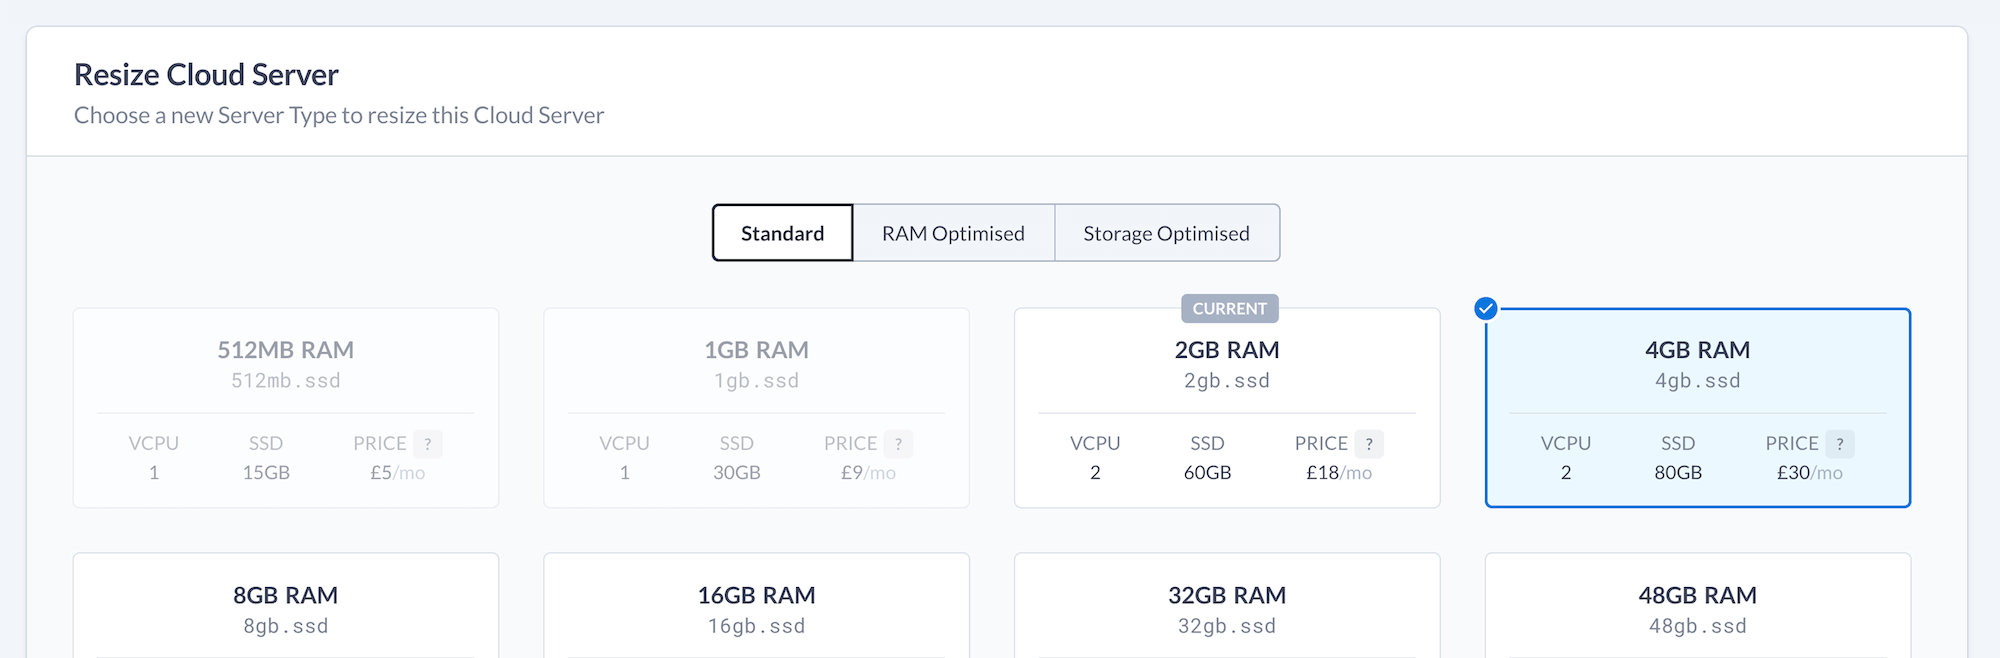
From the Cloud Server view, choose Resize
from the Server Type details
panel:

Choose the new Server Type you wish to resize to and click Save
:
Accessing new resources
After a successful Server Type change the increased RAM, CPU and (where relevant) local SSD allocations are made available to the Cloud Server immediately.
However, whether or not the new resource allocations are ready to be used straightaway will depend on the Cloud Server’s OS.
For example, one particular OS may recognise new CPU allocations and bring them online straightaway, whereas another may require restarting or bringing the new CPUs online manually.
RAM
The current memory available within a Cloud Server can be viewed using lsmem:
$ lsmem
RANGE                                 SIZE  STATE REMOVABLE BLOCK
0x0000000000000000-0x000000003fffffff   1G online       yes   0-7
0x0000000100000000-0x000000013fffffff   1G online       yes 32-39

Memory block size:       128M
Total online memory:       2G
Total offline memory:      0B
In the example above, a 1GB Cloud Server has been resized to 2GB. There are two
entries in the list and both lines have a STATE of online giving a new total
online memory of 2GB.
If, following a resize, additional memory remains offline it can usually be
brought online manually by running the following command or restarting:
$ echo 1 | sudo tee /sys/devices/system/memory/memory[0-9]*/onlineCPU
The current CPU allocation of a Cloud Server can be viewed using lscpu:
$ lscpu -e
CPU NODE SOCKET CORE L1d:L1i:L2:L3 ONLINE
0    0      0    0 0:0:0:0          yes
1    0      1    1 1:1:1:1          yes
2    0      2    2 2:2:2:2          no
3    0      3    3 3:3:3:3          no
In the example above, the CPU allocation has increased from 2 to 4 and the operating system recognises there are two additional CPUs present but they are not currently online.
If there are additional CPUs made available by the resize but which haven’t automatically been brought online by the operating system, we need to bring them online manually by running the following command or by simply restarting the server:
$ echo 1 | sudo tee /sys/devices/system/cpu/cpu[0-9]*/online
1
Local SSD storage
The current storage available within a Cloud Server can be viewed using lsblk:
$ lsblk /dev/vda
NAME    MAJ:MIN RM  SIZE RO TYPE MOUNTPOINTS
vda     252:0    0   60G  0 disk
├─vda1  252:1    0 29.9G  0 part /
├─vda14 252:14   0    4M  0 part
└─vda15 252:15   0  106M  0 part /boot/efi
In the example above, the storage has been increased from 30G to 60G. The vda
device is now showing as 60GB but the vda1 partition is still ~30GB and needs
to be “grown” to use the available space:
$ sudo growpart /dev/vda 1
CHANGED: partition=1 start=227328 old: size=62687199 end=62914527 new: size=125601759 end=125829087
Once the partition has been grown we can expand the filesystem to fill the partition.
Most of our official images use ext4, so we use resize2fs:
$ sudo resize2fs /dev/vda1
resize2fs 1.46.5 (30-Dec-2021)
Filesystem at /dev/vda1 is mounted on /; on-line resizing required
old_desc_blocks = 4, new_desc_blocks = 8
The filesystem on /dev/vda1 is now 15700219 (4k) blocks long.
For xfs formatted root partitions, use xfs_growfs:
$ sudo xfs_growfs /dev/vda1

meta-data=/dev/vda1              isize=512    agcount=16, agsize=655360 blks
        =                       sectsz=512   attr=2, projid32bit=1
        =                       crc=1        finobt=1, sparse=1, rmapbt=0
        =                       reflink=1    bigtime=0 inobtcount=0
data     =                       bsize=4096   blocks=10485760, imaxpct=25
        =                       sunit=16     swidth=16 blks
naming   =version 2              bsize=4096   ascii-ci=0, ftype=1
log      =internal log           bsize=4096   blocks=5120, version=2
        =                       sectsz=512   sunit=16 blks, lazy-count=1
realtime =none                   extsz=4096   blocks=0, rtextents=0
data blocks changed from 10485760 to 26214400
Resizing to a smaller RAM size
Cloud Servers using network storage types can be resized to a smaller size.
When decreasing the RAM amount the Cloud Server must be in inactive state
(i.e shut down) before the resize request can be initiated.
Once the Cloud Server is started again the reduced RAM and CPU allocations will be available.
- From the Cloud Server view, click the
Power State
dropdown, chooseShutdown
and then clickShutdown
again in the confirmation dialog - Wait until the status of the Cloud Server updates to
inactive - Now click the
Resize
button in the Server Type detail - Choose the new smaller Server Type you wish to resize to and click
Save
- Click
Resize
in the dialog to confirm the request - From the Cloud Server view, again click the
Power State
dropdown and chooseStart
- Once the state changes to
activethe server will begin booting - Access the server via SSH to confirm the change in resource allocation