Deploying Wordpress on Brightbox
Wordpress is a well-known application which allows users to host websites and blogs. With a rich ecosystem of themes and plugins it is a common choice for people wanting to maintain their own sites without getting their hands dirty with HTML files and databases directly.
Unfortunately one of the most common complaints about Wordpress is that it is relatively heavyweight and hard to scale, due to a combination of two factors:
- Relatively heavy use of SQL queries against a MySQL database.
- Relatively heavyweight PHP.
Many users start off running Wordpress upon a single host, running a database for storing the content and a webserver for hosting the application itself, but given enough traffic a single host can easily be overwhelmed.
This documentation will cover the installation of Wordpress using Brightbox:
- We can use a dedicated Cloud SQL instance for holding the database.
- The Cloud SQL service wraps up a MySQL in a tuned, and backed up fashion - so you don’t need to worry about taking care of security updates, monitoring, or similar.
- If the MySQL starts to become a bottleneck we can increase the resources made available to it.
- We can start out with a single cloud server as our webserver.
This document will walk through the process of creating a single database, and a single webserver. In a followup post we’ll discuss scaling beyond that, by seamlessly increasing capacity with a second webserver and the use of a load balancer.
Creating your MySQL database server
Wordpress relies upon a MySQL instance to store your data, whether it is author details, articles, blog-posts, or other types of content.
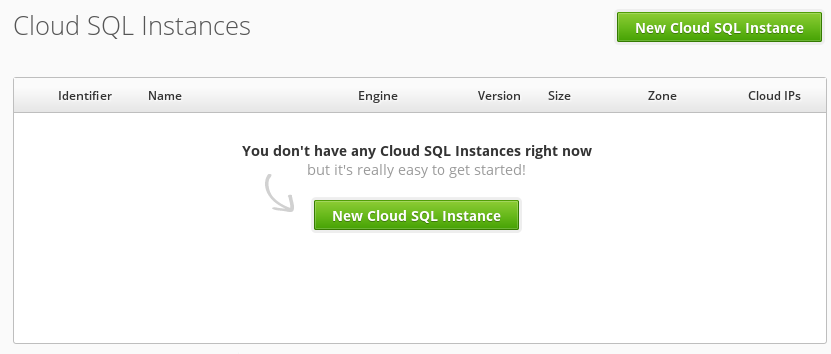
We’ll use the Cloud SQL instance, provided by Brightbox, as our database, so sign in to the Brightbox Manager and click on the “Cloud SQL” link in the sidebar. For a new account you’ll have no existing instances and the view will look like this:
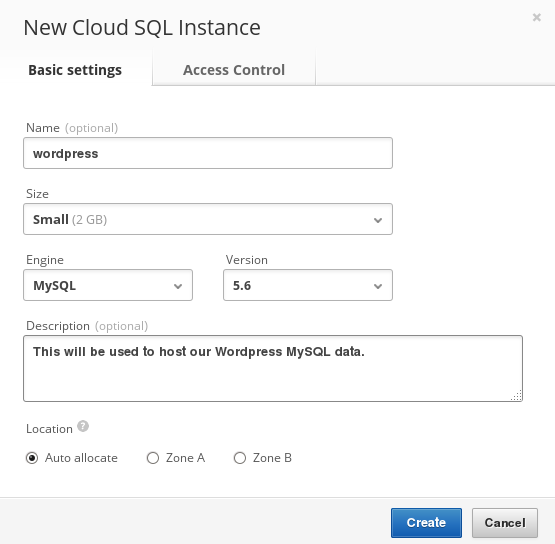
Click on the New Cloud SQL Instance link and a dialog will appear allowing you to create a new database instance. To create the new instance you merely need to enter a name for it, and choose the size.
We’ve chosen a small size, because our site isn’t popular yet:
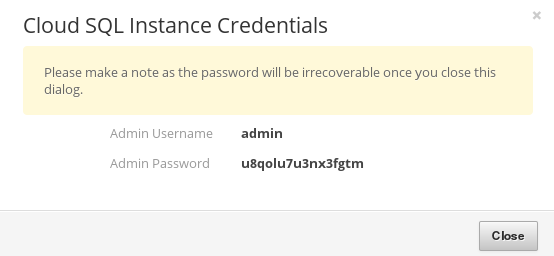
Once this dialog has been confirmed you’ll receive the details you’ll use in the future for performing connections - You must save these details, as they will not be made available in the future (although they can be reset if desired):
At this point you’ve initiated the creation of a new database instance, and safely stored away access details. You now need to wait a minute for the new database to be spun up, after which you can map a cloud IP to it so that you can access it from your future machines.
What is a cloud IP? A cloud IP address is exactly like a normal IP address, except it can be moved to point to something else in the future. In our followup article we’ll use this to seamlessly change an IP address from pointing to a single webserver to point to a load balancer, allowing our front-end to scale without having to manage updating DNS.
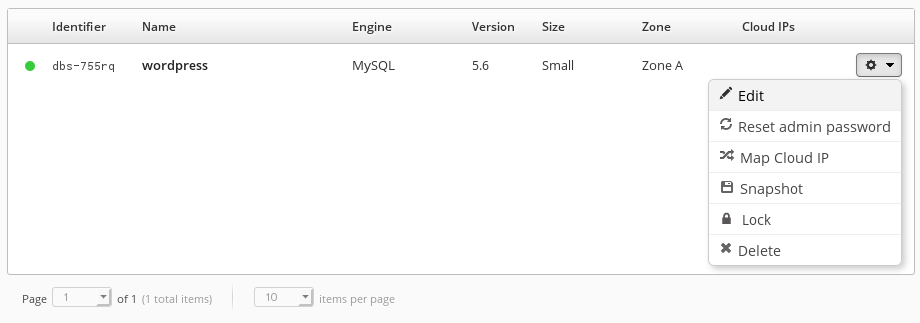
Creating a cloud IP involves using the context menu to the right of the instance:
The dialog will give you the option to create a new IP address, and this is all you need to select:
At this point we’ve done enough to proceed:
- We’ve created a MySQL instance which will hold our data.
- We’ve recorded our login details.
- We’ve added an IP address to it such that we can access it.
- Brightbox will take care of ensuring this host is up to date, and performing well.
- If we do find that it starts to become a bottleneck we replace it with a larger instance containing more RAM.
Creating your webserver
With the MySQL part of the deployment complete enough for the moment, we’re now going to create a cloud server to serve the Wordpress PHP files, and other media.
A single server, with adequate resources, will handle a reasonable amount of traffic, and if our site suddenly becomes popular we can scale initially by increasing the resources it has, later still once our site is even more popular we can scale by adding additional webservers.
As with a traditional virtual machine once you’ve created the cloud server to host your Wordpress installation you may control it fully, via SSH, and it will be dedicated solely to your needs.
However we’re not going to use SSH initially to configure it, instead we’re going to use the “user defined metadata” system to perform the initial setup. The metadata service allows your machine to poll an external source to retrieve information about itself. But more usefully there is the ability to configure a shell script which will be executed at the point your machine is created.
The user data usage is documented, with examples, and we’ll use that to install our Apache webserver, the PHP module, and the latest version of Wordpress itself.
It should be noted that we’ll be automating the installation of a webserver, and this will be distribution-specific. We didn’t need to know, or care, which distribution our Cloud SQL instance was running behind the scenes, but in order to install the webserver we’ll need to write a command such as apt-get install apache2, or yum install httpd.
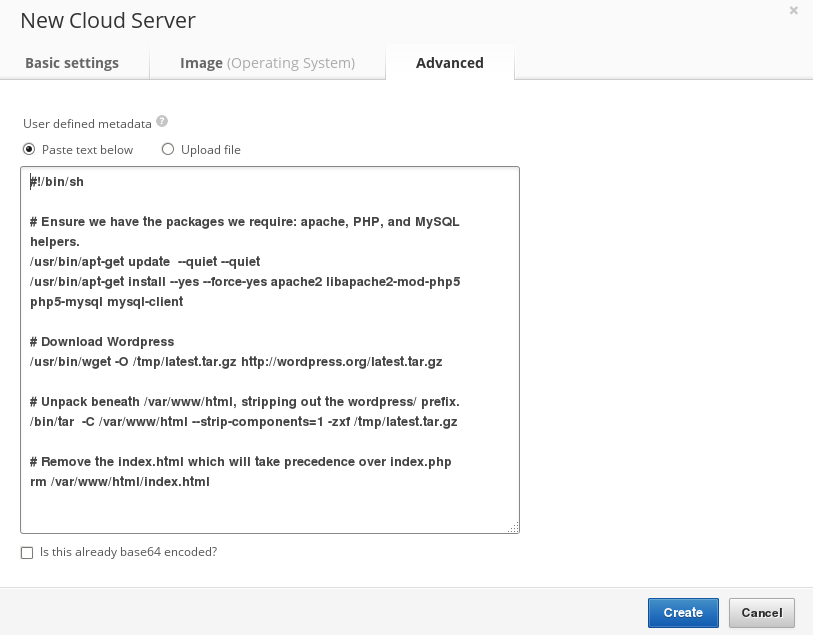
In this case we’ll be configuring the latest Ubuntu stable release for our webserver, so our installation recipe will certainly need to include the following commands:
$ apt-get update --quiet
$ apt-get install apache2 libapache2-mod-php5 php5-mysql
This will take care of installing a webserver which is capable of handling PHP files, as well as ensuring that the PHP scripts can access MySQL. We’ll also want to download the most recent version of Wordpress, and perform a couple of other minor tweaks. In short the following script will perform all the steps required to start the installation of Wordpress on a pristine instance of Ubuntu’s stable release:
 #!shell
 #!/bin/sh

 # Ensure we have the packages we require: apache, PHP, and MySQL helpers.
 /usr/bin/apt-get update  --quiet --quiet
 /usr/bin/apt-get install --yes --force-yes apache2 libapache2-mod-php5 php5-mysql mysql-client

 # Download Wordpress
 /usr/bin/wget -O /tmp/latest.tar.gz http://wordpress.org/latest.tar.gz

 # Unpack beneath /var/www/html, stripping out the wordpress/ prefix.
 /bin/tar  -C /var/www/html --strip-components=1 -zxf /tmp/latest.tar.gz

 # Remove the index.html which will take precedence over index.php
 rm /var/www/html/index.html
With that digression out of the way we can now proceed to creating our new cloud server. Assuming that you are signed in to the Brightbox Manager you should find a section labeled Cloud Servers
in the side menu.
By default this will look like
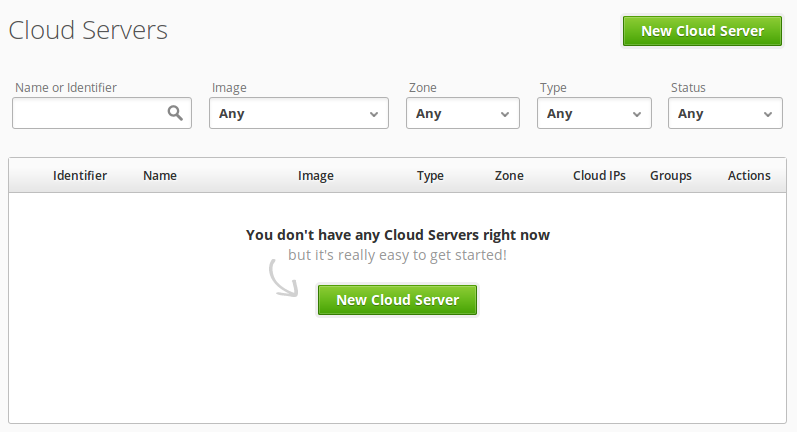
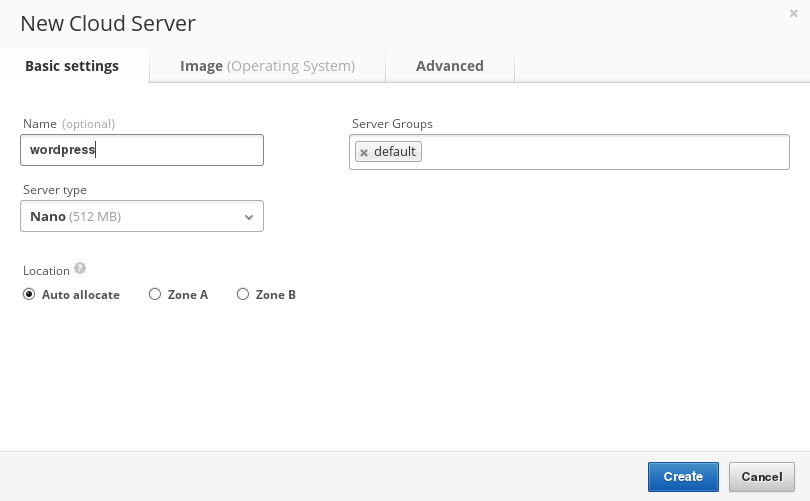
Click on the New Cloud Server
button to start the creation process, and you’ll see a dialog with three tabbed pages. On the first page enter a name for your server, and choose the size (we chose nano
, which is a 512MB ram instance):
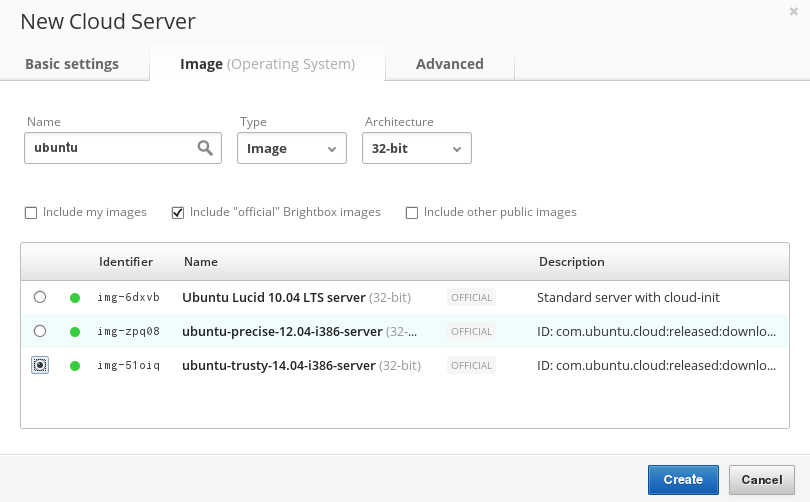
On the second tab we can choose which image we’re installing from, in our case we’ve decided we’re going to use the latest Stable release of Ubuntu:
Finally on the last tab we’re going to enter the script that will run when the image is first booted, which will install Apache, configure PHP, etc:
Once you’ve submitted the dialog you’ll see the spinning wheel to the left of your image name and within a minute, or so, the following things should have happened:
- Your cloud server should be created.
- Your cloud server should be launched.
- Your cloud server will install Apache, mod_php, and the MySQL extension for PHP.
- Wordpress should be downloaded, unpacked, and made available at
/var/www/html.
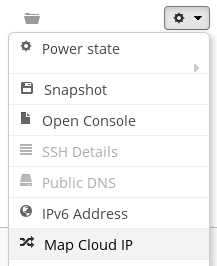
The next step will be mapping a cloud IP address to this server, so that we can access it over SSH, which we need to do to create the wp-config.php file that Wordpress will require.
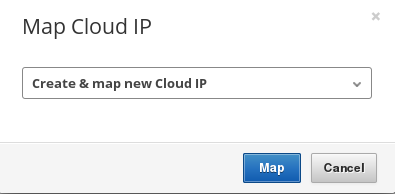
Mapping a cloud IP address to the cloud server is carried out in the same way as it was for our Cloud SQL instance. Using the actions menu to the right of our image we choose Map cloud IP
:
From here we accept the defaults:

We can view the IP that has been created, via the Cloud IPs
field in the machine list, and connect to that via SSH.
Finalizing the Wordpress installation
To complete the installation of Wordpress we need to configure it. The Wordpress installer is web-based, but sadly you still need to create a configuration file, and create the MySQL database. Thankfully both operations won’t take long, and can be carried out once connected to your cloud server, via SSH.
The Brightbox Ubuntu disk-images, which we chose to install from, have a preconfigured ubuntu user, so we can connect to that using the cloud IP we mapped in the previous section:
$ ssh ubuntu@109.107.36.113NOTE: Replace the IP here with that mapped to your cloud server.
Once you’ve done that you may use the MySQL client to create the database for your server - again replacing the details here with those that you received when you created your own Cloud SQL instance:
$ mysql --user=admin --password=u8qolu7u3nx3fgtm --host=109.107.36.113 -e "CREATE DATABASE wordpress"With the database created you may now visit your cloud IP to complete the installation wizard, using the same MySQL details you just created, at http://109.107.36.113/wp-admin/install.php
At the end of the process you’ll be given some settings to paste into a wp-config.php file, located at /var/www/html/wp-config.php.
Where to go next?
During the course of this guide we’ve covered several important things:
- Installing a hassle-free MySQL instance.
- Which our wordpress cloud server will use for storing all its data.
- Creating a new cloud server.
- We automatically installed some software as part of the creation-process.
- We mapped a cloud IP address to this server.