Attaching and Detaching Additional Volumes
Attaching a Block Storage Volume makes its storage accessible to a Cloud Server.
This guide covers attaching an already existing Volume, if you haven’t created any yet there is a separate guide for creating new Volumes.
Attaching a Volume
In Control Panel, choose Volumes
from the sidebar and find the Volume
you wish to attach.
The Attached to
item will show whether the volume is currently attached
to a Cloud Server:

To attach the Volume, click the Attach
button. You’ll be presented with
the “Attach Volume” panel with a list of available Cloud Servers to choose from.
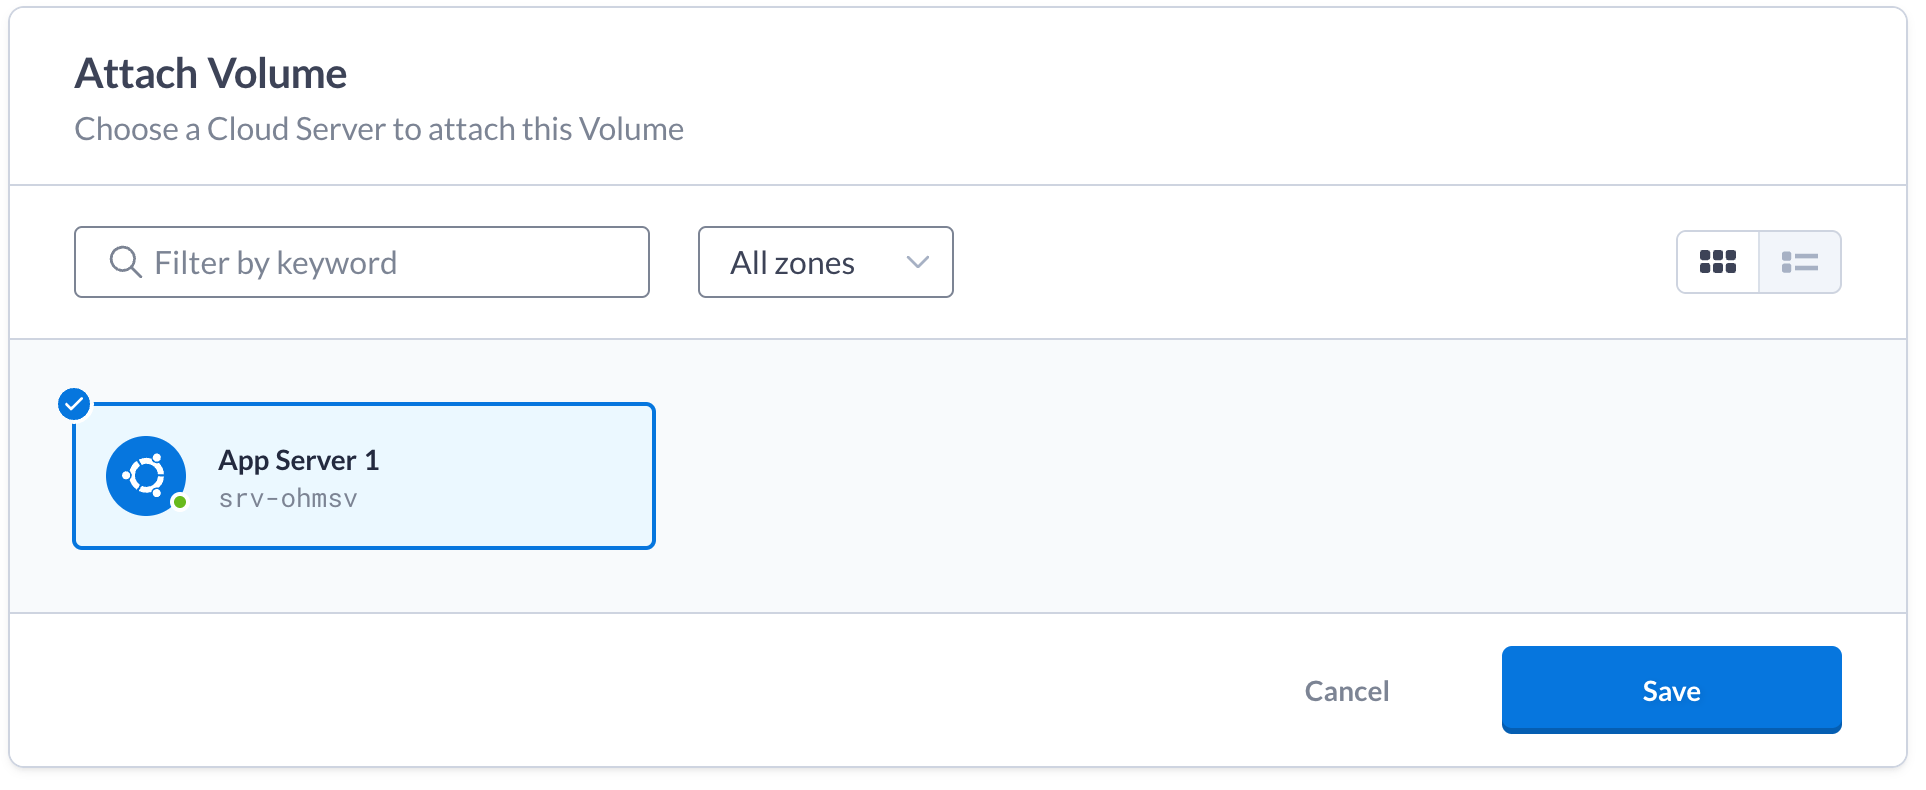
Choose the Cloud Server you want to attach the volume to and click Save
.
You’ll be presented with a confirmation dialogue, click Attach Volume
to
confirm and the volume will then be attached to the Cloud Server.
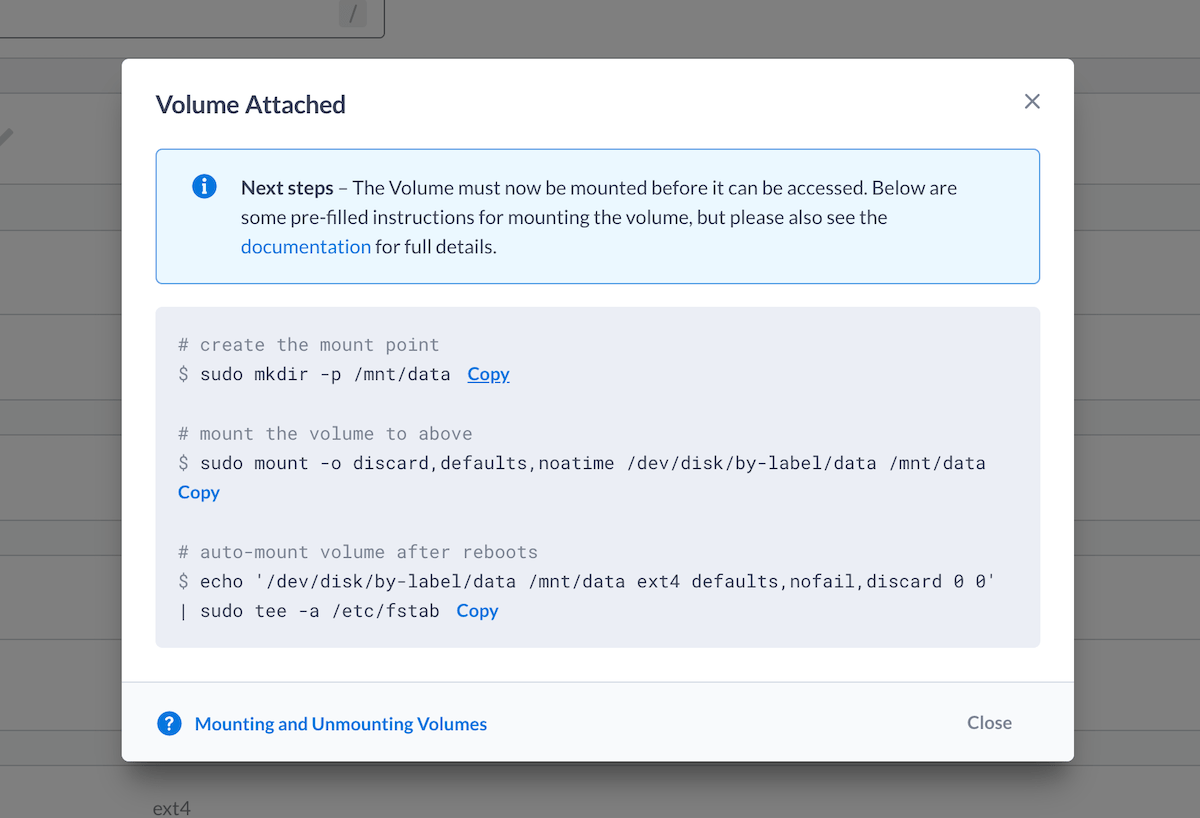
Now that the volume has been attached, you’ll be presented with a confirmation dialog with some instructions for mounting the volume, prefilled with the volume details, which you can copy and paste but we’ll go through the manual steps here to explain everything.
View attached Volumes
In this example we’re using a volume with a filesystem labelled data.
We can confirm the volume has been attached by logging into the Cloud Server
via SSH and using lsblk -f to list the available block devices with their
filesystems:
$ lsblk -f -I 252
NAME    FSTYPE LABEL           UUID                                 FSAVAIL FSUSE% MOUNTPOINT
vda
├─vda1  ext4   cloudimg-rootfs c545d079-6483-492d-a078-e32869326a2a     36G     7% /
├─vda14
└─vda15 vfat   UEFI            33A2-2A84                              99.2M     5% /boot/efi
vdb     ext4   data            9ab8824f-efd2-4279-a4e7-6e39ec85c214
We can see there is an additional device named vdb, with an ext4 filesystem
labelled data which isn’t currently mounted (we’re also using the -I option
here to simplify the results to only include devices that we’re interested in).
Formatting the Volume
If you didn’t specify an ext4 or xfs filesystem during
volume creation, you’ll need
to format the volume manually before
mounting.
Mount the Volume
Create the mount point
We need to create a directory which will serve as the mount point for the volume i.e. the location where the volume will be accessed within the Cloud Server:
$ sudo mkdir -p /mnt/dataMount the Volume
We now need to mount the volume to the mount point we created above. We can make use of persistent device naming here to reference the volume.
Using the Volume serial
The volume serial can be customised but defaults to the volume id:
$ sudo mount /dev/disk/by-id/virtio-vol-3n0qb /mnt/dataUsing the filesystem label
If you specified a filesystem label during volume creation you can use this
instead, along with the mount -L option:
$ sudo mount -L data /mnt/dataWe can now use lsblk -f to confirm that the filesystem is now mounted:
$ lsblk -f
NAME    FSTYPE   LABEL           UUID                                 FSAVAIL FSUSE% MOUNTPOINT
loop0   squashfs                                                            0   100% /snap/core20/1405
loop1   squashfs                                                            0   100% /snap/lxd/22526
loop2   squashfs                                                            0   100% /snap/core20/1434
loop3   squashfs                                                            0   100% /snap/lxd/22753
loop4   squashfs                                                            0   100% /snap/snapd/15177
loop5   squashfs                                                            0   100% /snap/snapd/15534
vda
├─vda1  ext4     cloudimg-rootfs c545d079-6483-492d-a078-e32869326a2a     36G     7% /
├─vda14
└─vda15 vfat     UEFI            33A2-2A84                              99.2M     5% /boot/efi
vdb     ext4     data            9ab8824f-efd2-4279-a4e7-6e39ec85c214   46.4G     0% /mnt/data
Configure fstab for auto-mounting
To ensure that the volume is mounted automatically following a reboot, we also
need to add an entry to the Cloud Server’s /etc/fstab
$ echo 'LABEL=data /mnt/data ext4 defaults,nofail,discard 0 0' | sudo tee -a /etc/fstabWe can verify our fstab entry using findmnt:
$ sudo findmnt --verify
Success, no errors or warnings detected
Detaching a Volume
Detaching a volume is pretty much the reverse of attaching a volume and will
leave the volume in the detached state, which means it is available to be
attached to another cloud server, or can be deleted.
Unmount the volume
To avoid data loss, it’s important to either shutdown the cloud server so that
it enters the inactive state, or unmount the volume within the cloud server:
$ sudo umount /mnt/dataWe can confirm the filesystem was unmounted using lsblk -f where we can see
that there is now no entry in the mountpoint column.
$ lsblk -f
NAME    FSTYPE   LABEL           UUID                                 FSAVAIL FSUSE% MOUNTPOINT
loop0   squashfs                                                            0   100% /snap/core20/1405
loop1   squashfs                                                            0   100% /snap/lxd/22526
loop2   squashfs                                                            0   100% /snap/core20/1434
loop3   squashfs                                                            0   100% /snap/lxd/22753
loop4   squashfs                                                            0   100% /snap/snapd/15177
loop5   squashfs                                                            0   100% /snap/snapd/15534
vda
├─vda1  ext4     cloudimg-rootfs c545d079-6483-492d-a078-e32869326a2a     36G     7% /
├─vda14
└─vda15 vfat     UEFI            33A2-2A84                              99.2M     5% /boot/efi
vdb     ext4     data            9ab8824f-efd2-4279-a4e7-6e39ec85c214
We should also make sure to delete any entries we made in /etc/fstab.
Detach the volume
Now that the filesystem is unmounted, we can go ahead and detach the volume from the cloud server.
In the volume view we can see that the volume is currently attached:

Click the Detach
button and you’ll be presented with a warning dialogue,
click Detach Volume
to confirm and the volume will be now be detached
from the cloud server.