Replicated filesystem with GlusterFS
GlusterFS is a scalable and highly available network filesystem that’s pretty easy to get up and running.
This guide will take you through building a shared filesystem with GlusterFS that is replicated across multiple cloud servers. Files written by any cloud server in the cluster can be read by any other server instantaneously, and those files will still be accessible even if one of the servers becomes unavailable.
We’re assuming you’re already signed up with Brightbox, and have provided your public SSH key.
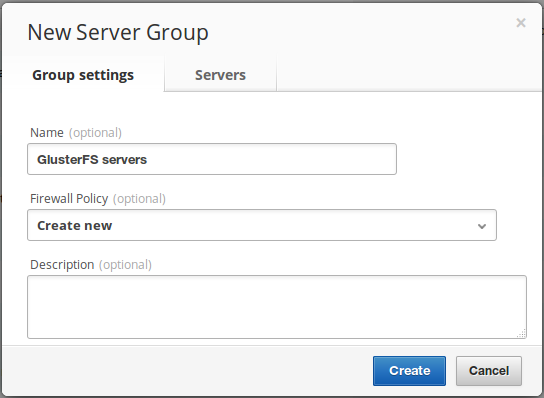
Create a Server Group
Firstly, create a server group to put our new GlusterFS servers in. Just click Server Groups
in the navigation bar on the right and click New Server Group
. Let’s call it GlusterFS Servers and we’ll create a new firewall policy to go with it.
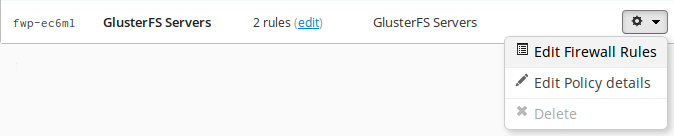
Setup the Firewall
Now add a rule to the firewall policy to let the GlusterFS servers speak to each other. So click Firewall Policies
in the navigation bar, find the new policy (it will be called GlusterFS Servers, like the group) and select Edit Firewall Rules
in the action menu.
Then click New Inbound Rule
.
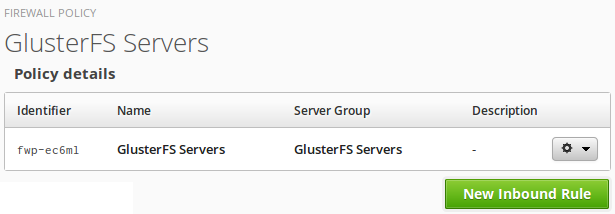
Set the source to be the GlusterFS Servers group itself - this will allow all servers in the group to connect freely to all other servers in the group (the destination of inbound rules is always the group to which the policy is applied). We’re allowing all ports here for simplicity but you can specify the exact ports if you like.
Give it a description if you like.

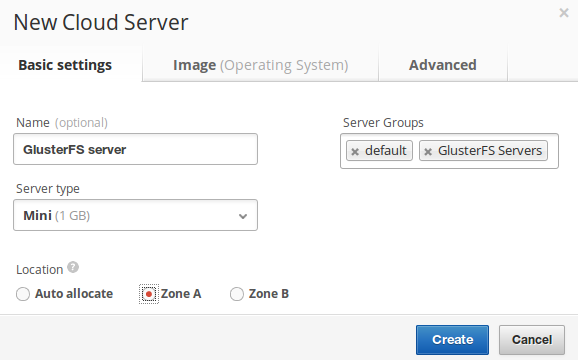
Build the Servers
Now build two Cloud Servers, one in each zone. Choose a server type depending on your needs (Standard 1GB servers come with 40GB disk), and we’ll call each one GlusterFS Server. Make sure to specify that they’ll be in the GlusterFS Servers group but keep them in the default group too, as that provides the firewall rules for SSH access and the general all outgoing rule.
Specify the Zone too; one server in Zone A and one in Zone B.
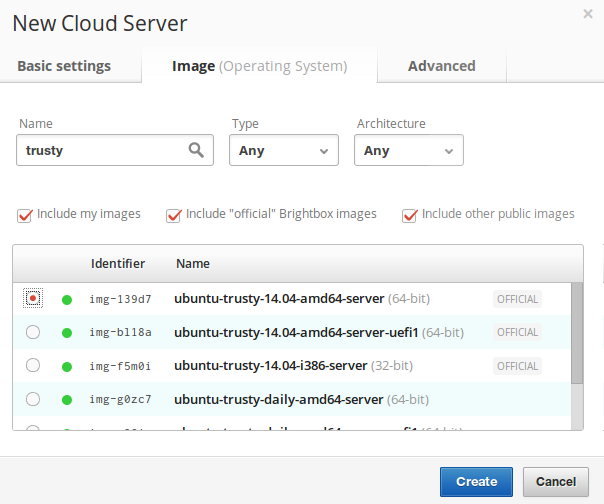
Then to the Image
tab and search for trusty, to find the Ubuntu 14.04 Trusty images, and select the amd64-server image. Then click Create
to start them building. They’ll both be built and ready for access within 30 seconds.
Accessing the Servers
All Brightbox Cloud Servers are accessible via IPv6 by default, so if you have a IPv6 connection then you can SSH into the servers right now using their IPv6 hostnames, for example:
$ ssh ubuntu@ipv6.srv-5b8qz.gb1.brightbox.comIf you don’t have IPv6, it’s quite easy to setup a tunnel. Or if you prefer, you can just map a Cloud IP to each server and use IPv4. In the Cloud Servers
list, click the Add +
button in the Cloud IPs
column, then select Create & map new Cloud IP
. Do that for both servers, and then you can SSH into them using their public IPv4 hostnames, for example:
$ ssh ubuntu@public.srv-5b8.gb1.brightbox.comInstall GlusterFS
SSH into each server and run the following commands. First, add the GlusterFS Ubuntu package repository. The standard Ubuntu 14.04 GlusterFS packages aren’t too bad, but better to have the newer version:
$ sudo apt-add-repository ppa:semiosis/ubuntu-glusterfs-3.5Then refresh the repository indexes:
$ sudo apt-get updateThen install the GlusterFS server and client packages (and the Ubuntu English language pack whilst we’re at it):
$ sudo apt-get -y install language-pack-en glusterfs-server glusterfs-clientInitialize the GlusterFS cluster
We now need to tell GlusterFS that these two servers should be a cluster. SSH into one of the servers and tell GlusterFS about the other one, like this:
ubuntu@srv-ngxbr:~$ sudo gluster peer probe srv-5b8qz

peer probe: success
You can now view the cluster status from either server like this:
ubuntu@srv-5b8qz:~$ sudo gluster peer status

Number of Peers: 1

Hostname: 10.225.19.190
Port: 24007
Uuid: c55f695c-3f6e-458b-ad57-e58453b21c8f
State: Peer in Cluster (Connected)
Create a volume
So now you need to create a GlusterFS volume, which in this context is the shared filesystem. GlusterFS supports quite a few different ways to configure your volumes and can place data across your cluster according to different policies. In this case, we just want two copies of our data to be stored, one on each server.
So, create a volume named mirror and tell GlusterFS to store two replicas. You need to specify the two servers you just built and where to store the data on them (/srv/export is good).
You can run this command on either server, but you only have to run it on one:
$ sudo gluster volume create mirror replica 2 srv-ngxbr:/srv/export srv-5b8qz:/srv/export force

volume create: mirror: success: please start the volume to access data
Then start the volume:
$ sudo gluster volume start mirror

volume start: mirror: success
You’ll see that GlusterFS has created /srv/export directories on both servers. It’s sometimes useful to peek inside this directory but you should never write to it directly, as GlusterFS won’t know you made a change and it will get confused.
Mount the filesystem
To access the filesystem, you just need to mount it. First you need to make a mount point:
$ sudo mkdir /mnt/mirrorThen, to mount the filesystem you need to specify one of the servers to mount from. Since we’re mounting the filesystem on the GlusterFS servers themselves, we can specify localhost:
$ sudo mount -t glusterfs localhost:/mirror /mnt/mirrorAnd see that it’s mounted:
ubuntu@srv-ngxbr:~$ df -h

Filesystem         Size  Used Avail Use% Mounted on
localhost:/mirror   40G  816M   37G   3% /mnt/mirror
You can configure the filesystem to automatically mount on boot by adding it to /etc/fstab
localhost:/mirror /mnt/mirror glusterfs defaults,_netdev 0 0
Don’t forget the _netdev option to ensure mounting is only attempted after networking has been setup, or your server might get stuck on boot.
On performance
It’s worth noting that, whilst GlusterFS is very flexible, it much slower than a local filesystem, especially when serving lots of small files.
It’s not a great idea to put your whole web root directly on a GlusterFS filesystem and definitely a terrible idea to serve something like a PHP application directly from it, which might read lots of small files on every page view.
Better to deploy your application to each server’s local filesystem and use the GlusterFS filesystem for storing just the uploaded web assets, such as avatars or file attachments etc. Adding a front-end web cache or a CDN is a good idea if you need to serve a high volume of traffic from GlusterFS.
Security
You’ll notice that we didn’t configure any usernames or passwords here. It is possible to have GlusterFS require authentication to do mounting (or it’s own IP acls) but here we’ve just opted to use the Brightbox distributed firewall to control access.
So it’s important you get the firewalling right and limit access to servers you trust. Don’t expose GlusterFS to the Internet!
Summary
So now you have two Cloud Servers running as GlusterFS servers, and each with the GlusterFS filesystem mounted. Files written on either server are instantly replicated to the other server. If either server suffers any problems, the other server is seamlessly used to serve the file, with zero interruption to service.
We’ve got another guide coming up on building an additional GlusterFS client to use these servers, and a guide on healing the filesystem after an outage.